|
|
|
|
|
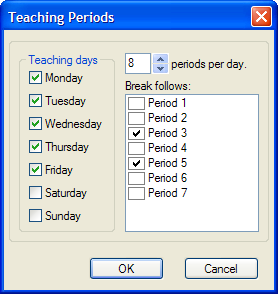
After starting FineTime, as explained in section 1.2, choose File - New from the menu bar. This invokes the Teaching Periods dialog, shown in Figure 1.3, for you to tell FineTime how the teaching weeks and days at your school are structured.

|
The check boxes on the left side of the dialog allow you to specify which days of the week are teaching days at your school. Check the boxes corresponding to the days for which you want to schedule lessons.
Now, enter the number of teaching periods per day in the top field on the right, and a number of check boxes appear in the region below. Mark the boxes corresponding to those periods which are followed by a break so that FineTime knows that multi-period lessons may not extend beyond these periods.
When you click the OK button, the dialog is dismissed and you see that the headings for your new timetable have appeared in the timetable window. The teaching days and number of periods per day match your entries in the Teaching Periods dialog.
Should you wish at a later time to change the structure of the school week or days used for your timetable, you can invoke the Teaching Periods dialog by choosing School - Periods from the menu bar and change the fields accordingly. The structure of the displayed timetable changes to reflect the new settings.
|
|
|
|
|